
[fullwidth background_color=”” background_image=”” background_parallax=”none” enable_mobile=”no” parallax_speed=”0.3″ background_repeat=”no-repeat” background_position=”left top” video_url=”” video_aspect_ratio=”16:9″ video_webm=”” video_mp4=”” video_ogv=”” video_preview_image=”” overlay_color=”” overlay_opacity=”0.5″ video_mute=”yes” video_loop=”yes” fade=”no” border_size=”0px” border_color=”” border_style=”solid” padding_top=”20″ padding_bottom=”20″ padding_left=”5%” padding_right=”” hundred_percent=”no” equal_height_columns=”no” hide_on_mobile=”no” menu_anchor=”” class=”” id=””]
AWS Cloud9 is launched as an Integrated Development Environment (IDE) for writing, running, and debugging code. The unique feature of AWS Cloud9 IDE is that all work could be done from our web browser itself as it is a browser-based IDE. Its working is based on the ”Ace Editor’ and the Cloud9 on its c9.io IDE. It comes in a pre-built form which includes few useful tools which are important for many programming languages like PHP, Javascript, Python, etc. So, we don’t require to install any compilers and toolchains. It aids to work with serverless applications which are very useful to switch between local and remote testing and debugging.
How to get started with AWS :
As a first step, go to the link ” https://aws.amazon.com”.
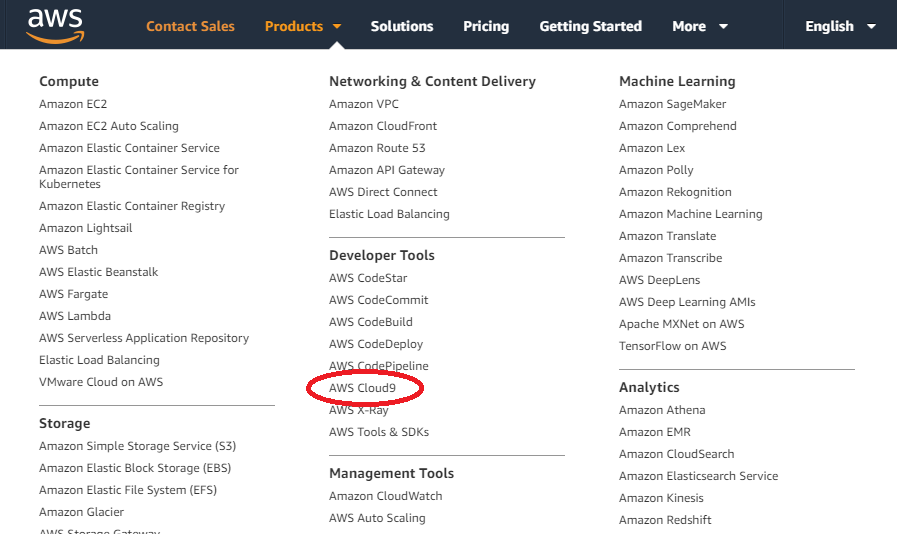
AWS provides a free trial for 1 month and if you are really interested to use more, you could select the package according to your needs. Choose the ‘products’ in menu bar. Now you will see a lot of amazon products. Click on ‘aws cloud9’ and then click on “get started with aws cloud9”.
 [/imageframe]
-
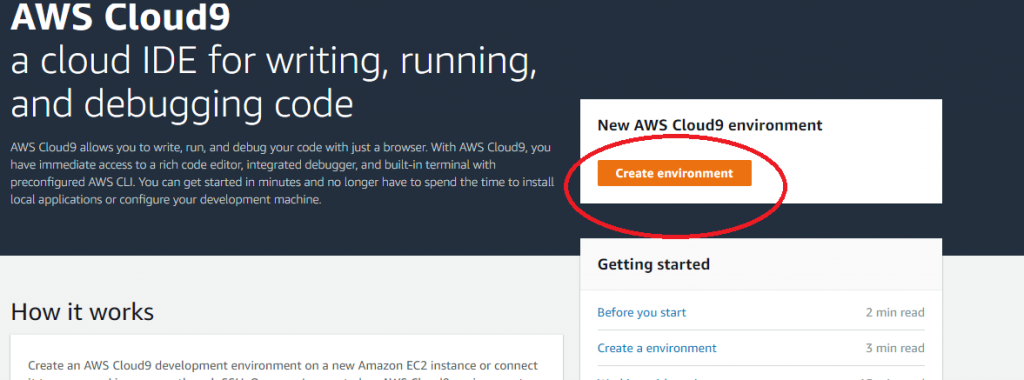
Step 1: Create an Environment :
To start working with AWS Cloud9, we need to create an environment as shown in the figure.
 [/imageframe]
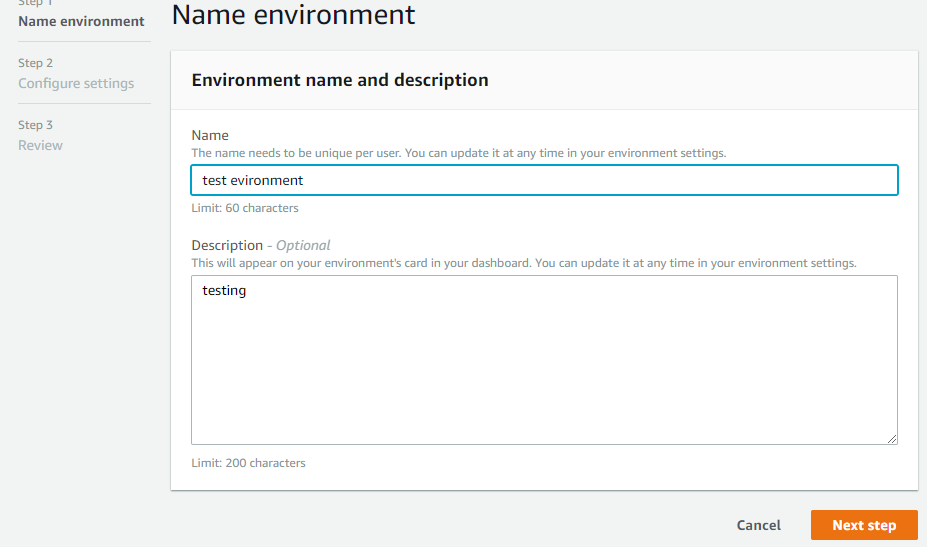
For creating an environment , just enter your project’s name and provide a brief description of your project.
 [/imageframe]
-
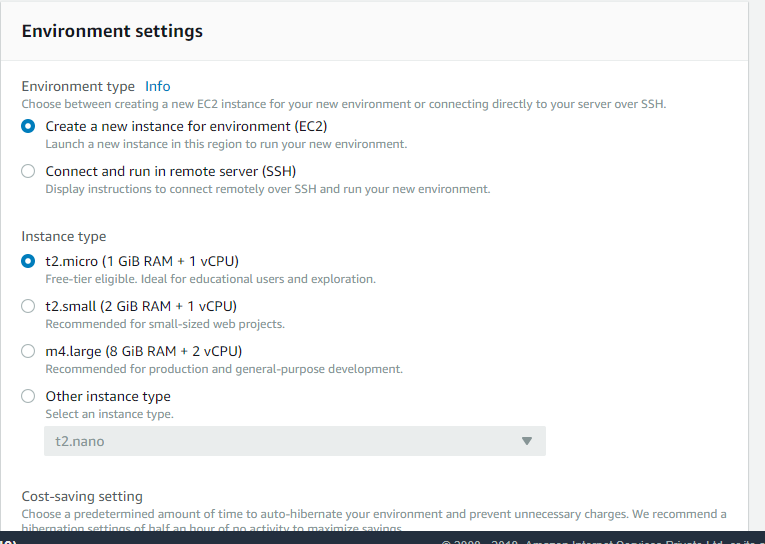
Step 2: Configure Settings
Here we need to choose the environment type and instant type as shown in the figure below.
 [/imageframe]
After completing the configuration settings, we could review the details by selecting the
‘create environment’. On choosing ‘create environment’ we will enter into the editor. Here you will find options to create a new file or open files which we have already created.
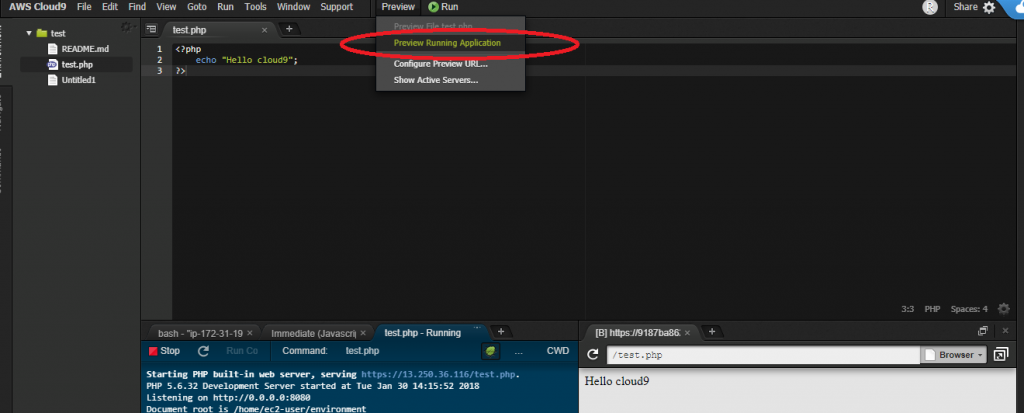
Write your codes here and run the code by clicking on ‘Run ‘ in the menu. There’s also an option to preview our output if you select the ‘preview’ option.
 [/imageframe]
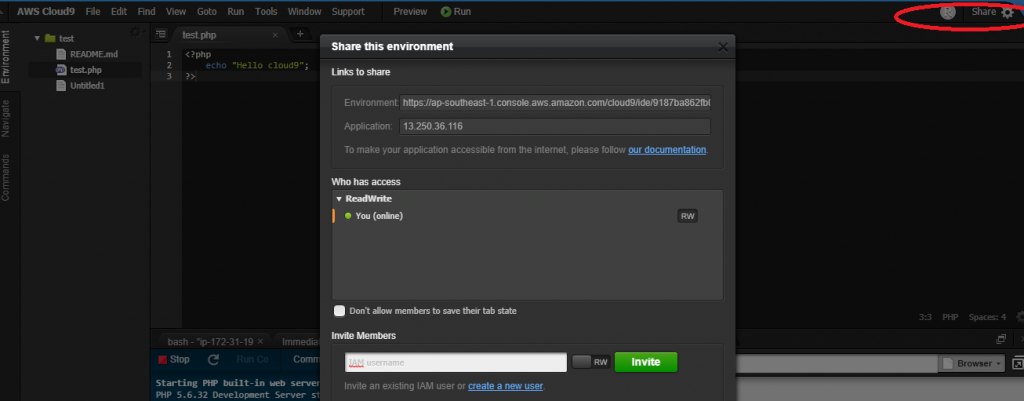
In AWS Cloud9, it is possible to share our environment with our team members or friends through ‘share’ option at the top-right corner of the editor. We could see our friends who are online at the same time and we can invite them too.
 [/imageframe][/fullwidth]
Thus with AWS Cloud9 IDE you can effortlessly write, run and debug serverless applications.
ServerAdminz provides Outsourced 24/7 Technical Support, Remote Server Administration, Server Security, Linux Server Management, Windows Server Management and Helpdesk Management to Datacenters, Hosting companies and ISPs around the world. We specialize in Extended Server Security, Server Hardening, Support of Linux/UNIX/Windows servers, products and services. If you are looking for a server management service provider, you can contact us on sales@serveradminz.com or +1 (845) 271 7172.
ServerAdminz is a server support company specialized in Outsourced 24/7 Web Hosting Support, Remote Infrastructure Management, NOC, Cloud and Enterprise Security Services. With over 10+ of years of experience in working with major Data Centers and ISPs with 130+ experienced technicians, we continue to manage more than 49,000 servers from 85+ countries and has bagged 5 international awards.
If you have any queries on how to setup AWS Cloud9 IDE feel free to leave us a message and our representative will get back to you.[two_third last=”yes” spacing=”yes” center_content=”no” hide_on_mobile=”no” background_color=”” background_image=”” background_repeat=”no-repeat” background_position=”left top” border_position=”all” border_size=”0px” border_color=”” border_style=”” padding=”” margin_top=”” margin_bottom=”” animation_type=”” animation_direction=”” animation_speed=”0.1″ class=”” id=””]


Leave A Comment
You must be logged in to post a comment.