Introduction
Securing your application with SSL is a must-have for modern businesses. Whether you’re setting up a secure website or ensuring encrypted communication via your load balancer, AWS makes it easy with Certificate Manager (ACM). In this guide, we’ll walk through the steps to import an SSL certificate, verify domain names, and configure it with an AWS Load Balancer Listener.
Step 1: Import the SSL Certificate into AWS Certificate Manager
If you already have an SSL certificate from a third-party provider, you can import it directly into AWS Certificate Manager (ACM).
- Navigate to AWS Certificate Manager in the AWS Console.
- Choose “Import a certificate”.
- Use your text files to input:
- The public certificate body.
- The private key.
- The certificate chain (optional but recommended).
Click “Next” to continue.

Make sure the certificate is in PEM-encoded format, which is standard for AWS ACM.
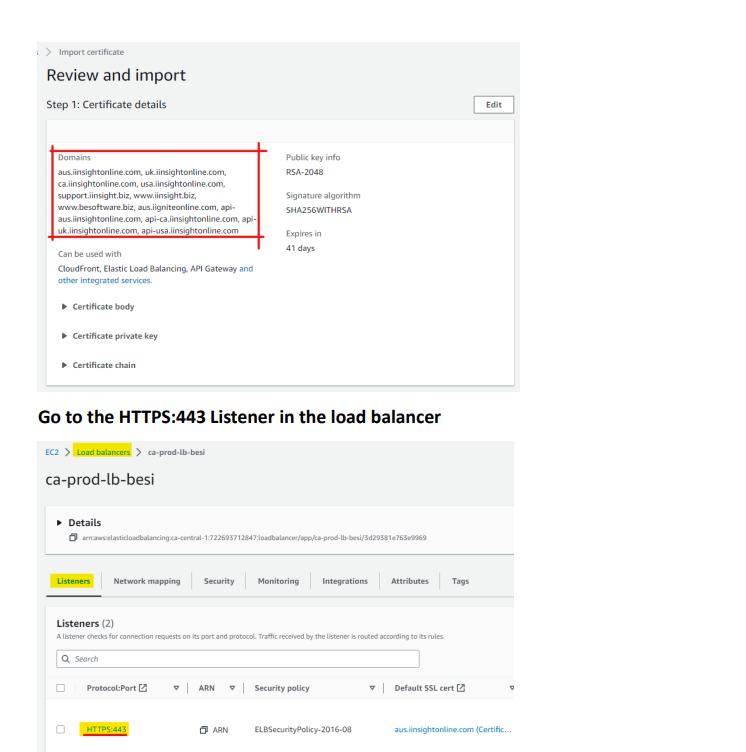
Step 2: Verify Domain Names and Subject Alternative Names (SANs)
Once the certificate is uploaded:
- Double-check that all Domain Names and SANs (Subject Alternative Names) listed in the certificate match your application domains.
- This is crucial, especially for multi-domain or wildcard certificates.
You can view this information directly in the ACM dashboard under your certificate’s details.
Step 3: Configure SSL on the Load Balancer
After successfully importing the certificate, you need to apply it to your load balancer.
Go to the Load Balancer HTTPS Listener
- Navigate to the EC2 Dashboard → Load Balancers.
- Select the load balancer you want to update.
- Under the Listeners tab, find the HTTPS:443 listener.
Click “View/edit rules” or “Edit” depending on your interface.
Add the Listener Certificate
Under the Certificates section, you’ll see the current (default) certificate in use.
Click “Add” to attach your newly imported certificate.
Important: Only replace the default certificate if absolutely necessary. Otherwise, you can keep multiple certificates under the same listener.
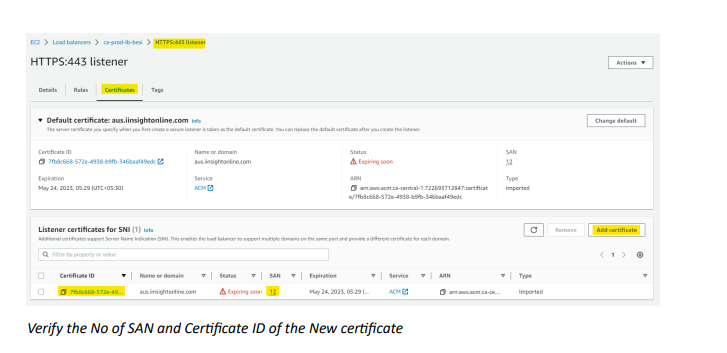
Step 4: Verify the Certificate Details
After the certificate is added:
Confirm the Certificate ID matches the new one you’ve uploaded.
Review the number of SANs to ensure all expected domains are covered.
You can use the AWS CLI or ACM dashboard for verification.
Final Tip: Refer to AWS Documentation for Deep Dive
AWS provides detailed official documentation with screenshots and best practices. If you’re unsure at any step, it’s a good idea to consult the AWS Certificate Manager Documentation.
Conclusion
Importing and configuring SSL certificates in AWS is a straightforward process with the right steps. By ensuring your certificate is correctly set up and mapped to the appropriate listener, you safeguard user data and enhance trust. Whether it’s for a production site or internal tools, SSL is no longer optional—make sure it’s done right.

